One of the most important reasons for setting up Google Analytics 4 (GA4) is so that you can track what visitors do on your website.
But there are several other benefits to activating the analytics, including:
- It has enhanced tracking capabilities that provide deeper insights into user behavior. You'll better understand how website visitors behave across multiple devices and platforms, including websites, mobile apps, and offline interactions.
- Cross-device attribution allows you to track conversions across various devices and channels.
- Enhanced privacy features are at the core of GA4, aligning with evolving data protection regulations like the General Data Protection Regulation (GDPR) and California Consumer Privacy Act (CCPA).
- Advanced analysis and insights help online stores uncover valuable trends, identify growth opportunities, and make data-driven decisions. GA4's machine learning algorithms can provide actionable recommendations for improving customer engagement, optimizing marketing campaigns, and enhancing the overall user experience.
- Online stores can future-proof their analytics infrastructure through GA4. The analytics technology is likely to receive continued updates and support from Google, placing any early adopters at the forefront of the latest features and enhancements.
How to setup Google Analytics 4 for WooCommerce
Setting up Google Analytics 4 is easier than it sounds. We take you through the process step-by-step, and it shouldn't take longer than 15 minutes.
To set up conversion tracking with GA4 for WooCommerce, you will need to:
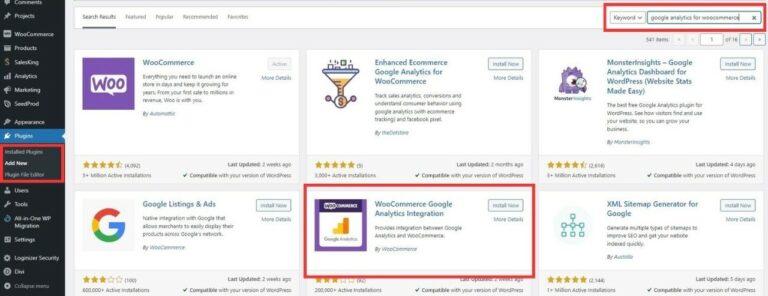
STEP 1: Install the Google Analytics for WooCommerce plugin.
- On the WordPress dashboard, click the “Plugins” tab. Then, click on the “Add New” button.
- Type “Google Analytics for WooCommerce” in the search bar and click the “Install Now” button.
- Once the plugin is installed, click “Activate.”
STEP 2: Create a Google Analytics 4 property.
- Go to the Google Analytics website. Sign in to your account. Navigate to the left-hand side menu bar. Scroll down and click the “Admin” tab, then select “Create Property.”
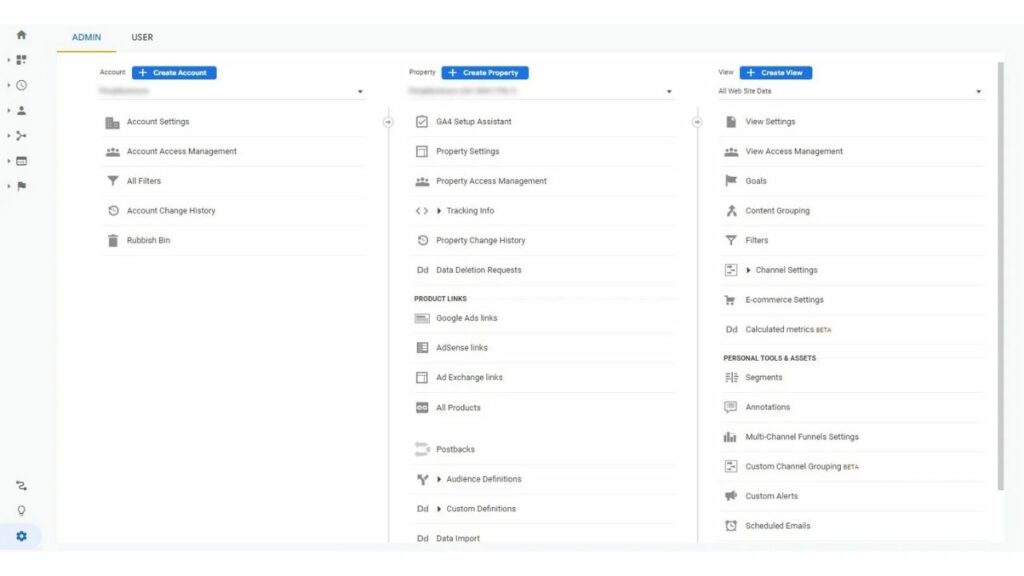
- Enter the property name that you want to use.
- You can also choose your time zone and currency in the drop-down menu. Click on ‘Next'
- On the next screen, choose an industry type and the size of your company. Afterward, you'll go to the next step: select one or several business objectives.
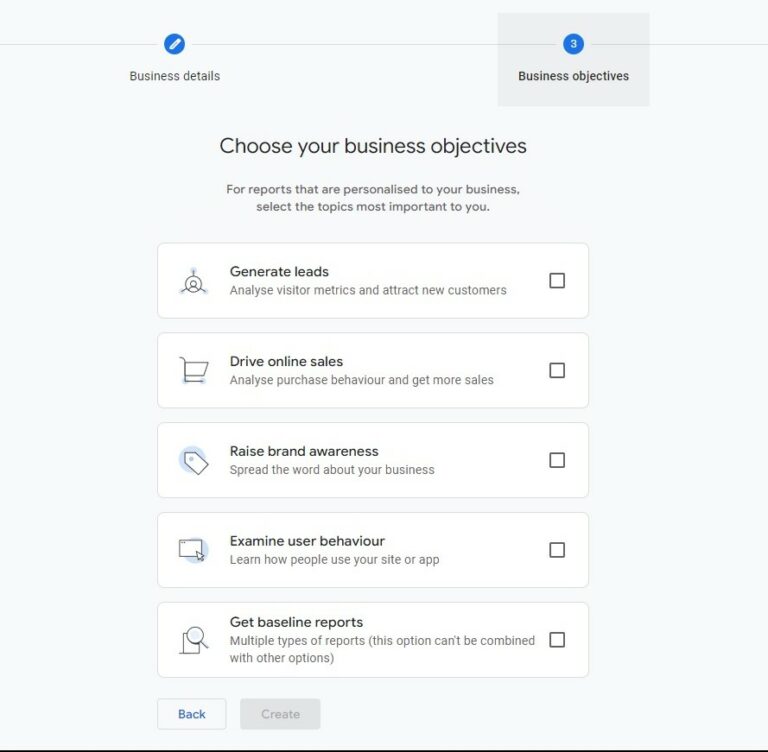
- Once you've decided on your objectives, click “Create.”
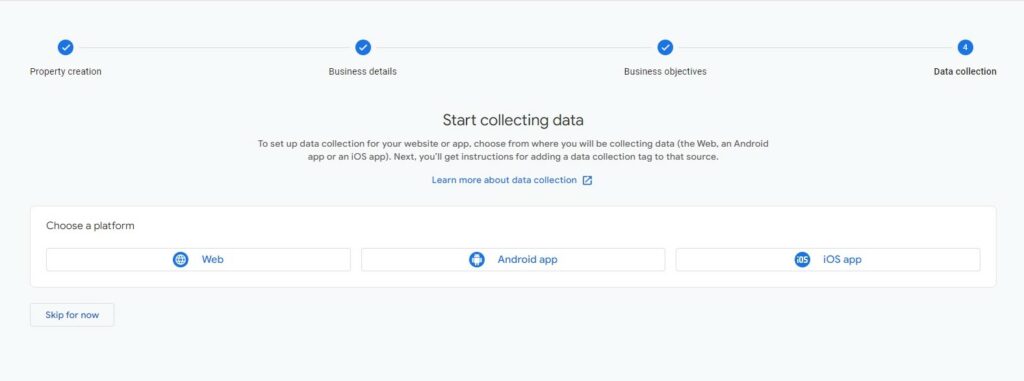
- Next, you'll have three options for collecting data: Web, Android, or iOS app. Once you choose an option, a slide-out window will appear, and you'll be required to fill in additional data stream information about your preferred choice. We've selected the Web for this tutorial.
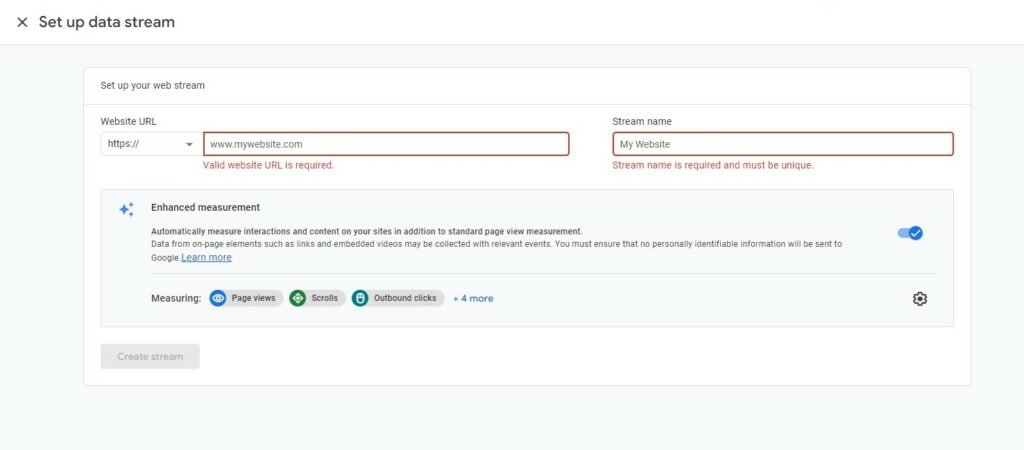
- By clicking on the gear icon in the bottom left, you can adjust enhanced measurement options if you wish.
- Click on “Create stream.”
STEP 3: Get your Google Analytics 4 measurement ID
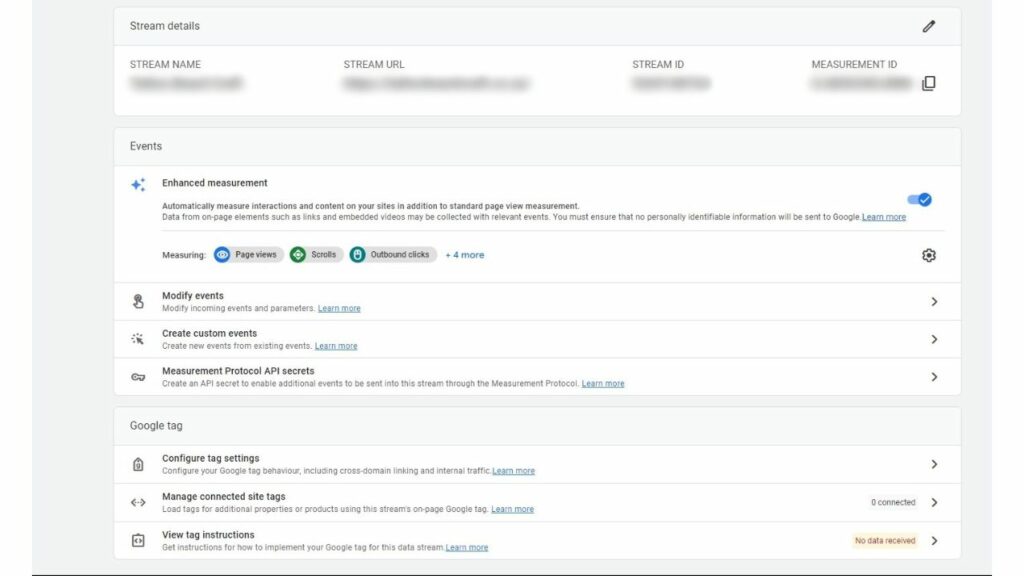
- Once you have created a GA4 property, you'll get a measurement ID.
- This ID is a long string of letters and numbers that will be used to identify your property in Google Analytics.
- You can also find your measurement ID in your GA account's “Property Settings” section.
STEP 4: Configure the GA for WooCommerce plugin.
- In the Google Analytics for WooCommerce plugin settings, you need to enter your GA4 measurement ID. You'll also need to select the events that you want to track.
- To configure the plugin, go to your WordPress dashboard and click on the “WooCommerce” tab.
- Then, click on the “Settings” tab. From there, choose the “Google Analytics” tab.
- In the “Google Analytics 4 Tracking” section, enter your GA4 measurement ID.
- Select the events that you want the platform to track.

STEP 5: Save your settings
- Once you have configured the plugin, you'll need to save the settings to activate the link.
- Scroll to the bottom of the “Google Analytics” settings page and click the “Save Changes” button.
After completing these steps, Google Analytics will start tracking WooCommerce events.
You can view your WooCommerce data in your GA account's “Conversions” section. Remember that it can take up to 48 hours for Google to activate the tracking sequence.


