The process outlined here is the same regardless of whether your website pages have the Analytics tag or whether you use Google Tag Manager.
How to Upgrade to Google Analytics 4
Step 1: Start Measuring
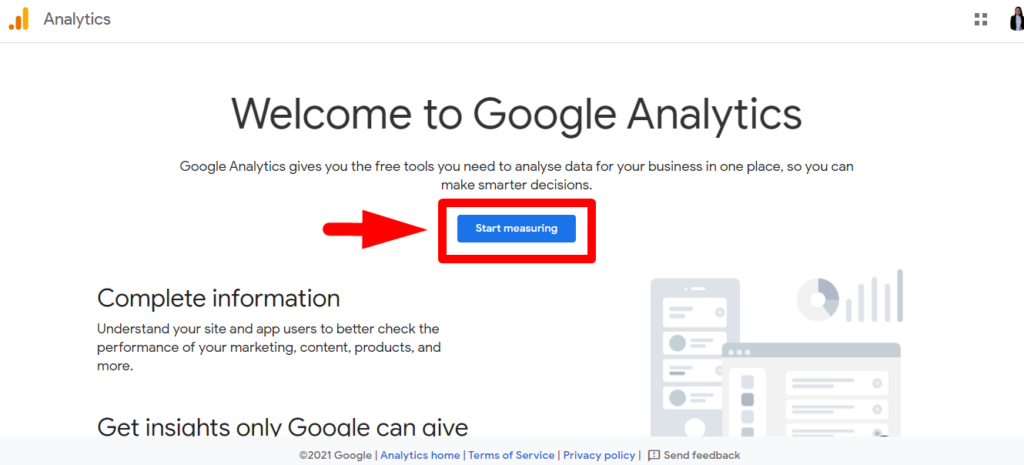
Go to this link to create your Google Analytics account. Then, click Start measuring.
Step 2: Account Setup
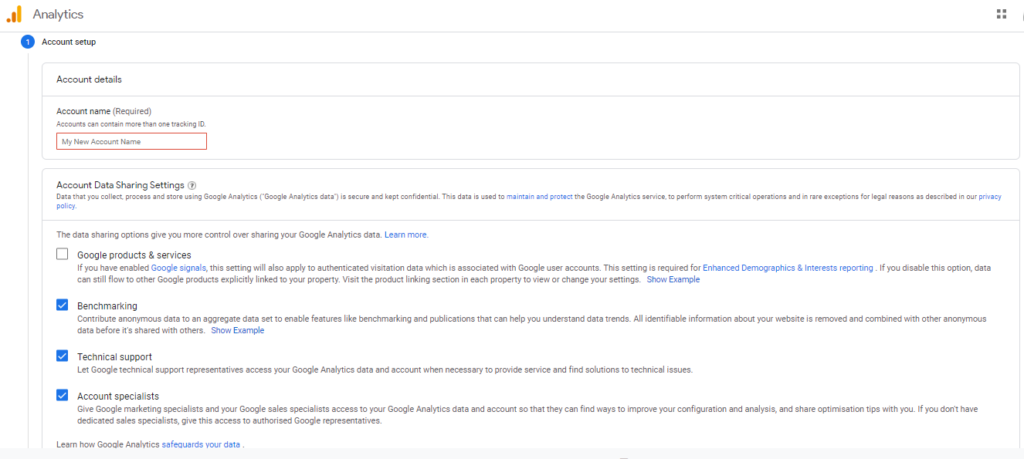
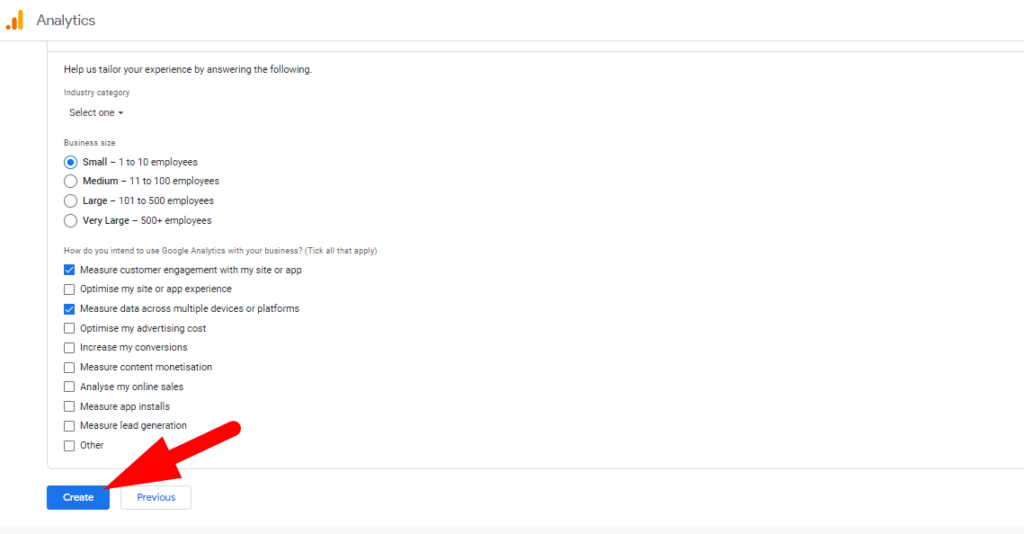
Fill out the set up form with the required details:
- Account Name (the name of your store)
- Account Data Sharing Settings
- Property Name
- Time zone
- Currency
- Business Information
Step 3: Email communications
After setting up your Google Analytics 4 Property account, you will then be directed to the Analytics dashboard and Google will ask you about email communications.
This is a way of telling Google Analytics the type of email you want to receive from them. I recommend choosing the first one: Performance, Suggestions, and Updates.
Step 4: Set up Data Stream
You need to set up your data stream to make the connection between Google Analytics 4 and your Shopify store. To set it up, Data Stream on the left panel, then select “Web.”

On the next page, key in the URL of your Shopify store and your store's name. Then, click Create stream.

Step 4: Install tracking code
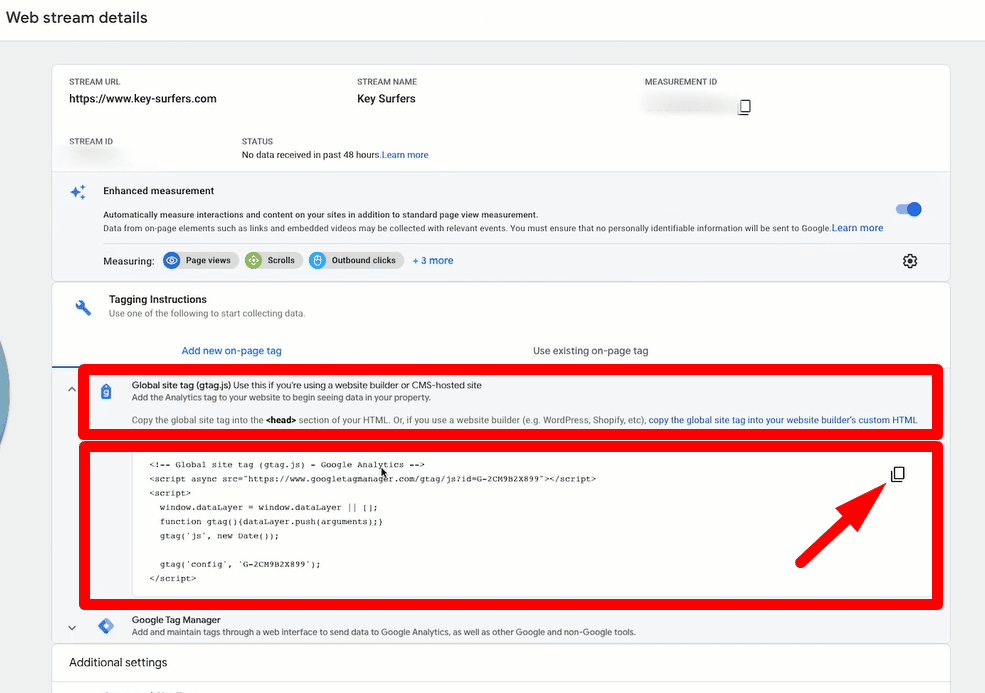
On the Web stream details window, click on “Global site tag (gtag.js)” to copy the code.
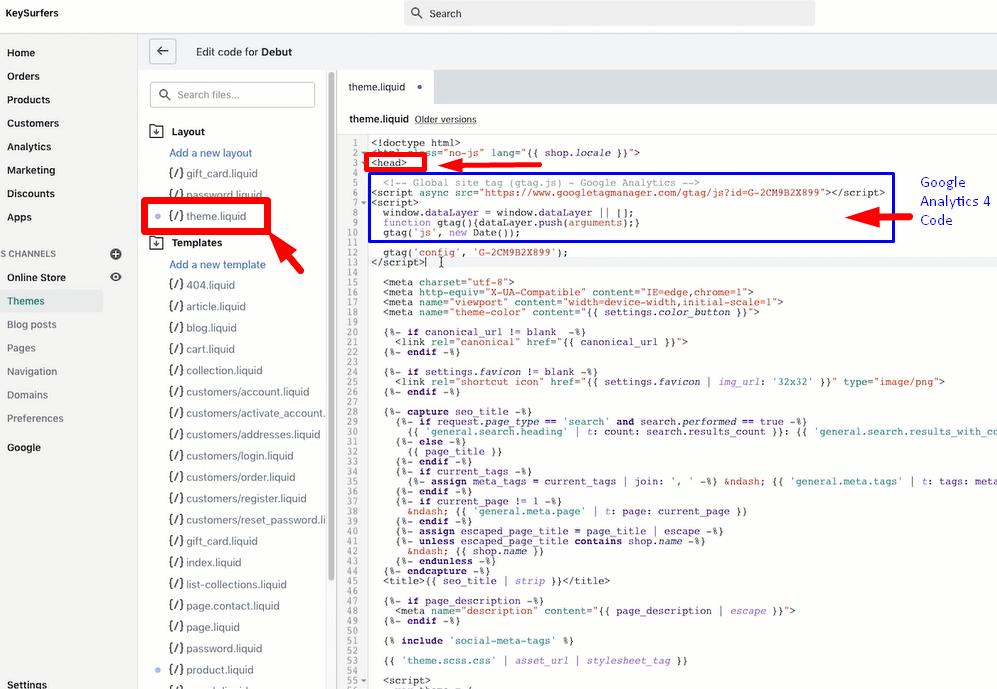
Then, log in to your Shopify dashboard. On the left navigation panel, click on Online Store > Themes > Actions > Edit code.
It’s going to open up the code for the theme you’re currently using. Make sure to select theme.liquid from the left hand side of the page, and find the tag.
You need to paste the Google Analytics 4 property code below the head tag. Then, click Save.
How to know if Google Analytics 4 is Working
To confirm if the Google analytics code you’ve installed in your Shopify store is working, just go to the live view of your Shopify website. Browse through the pages to send the information back to your Google Analytics 4 dashboard. The activity on your website will trigger the tracking code and see if it’s working.
To see the report, go back to your Google Analytics 4 dashboard and from the left side panel, click on Real-time. This page will show you, in REAL TIME, the number of people that are currently using your website as well as the pages they have been to.
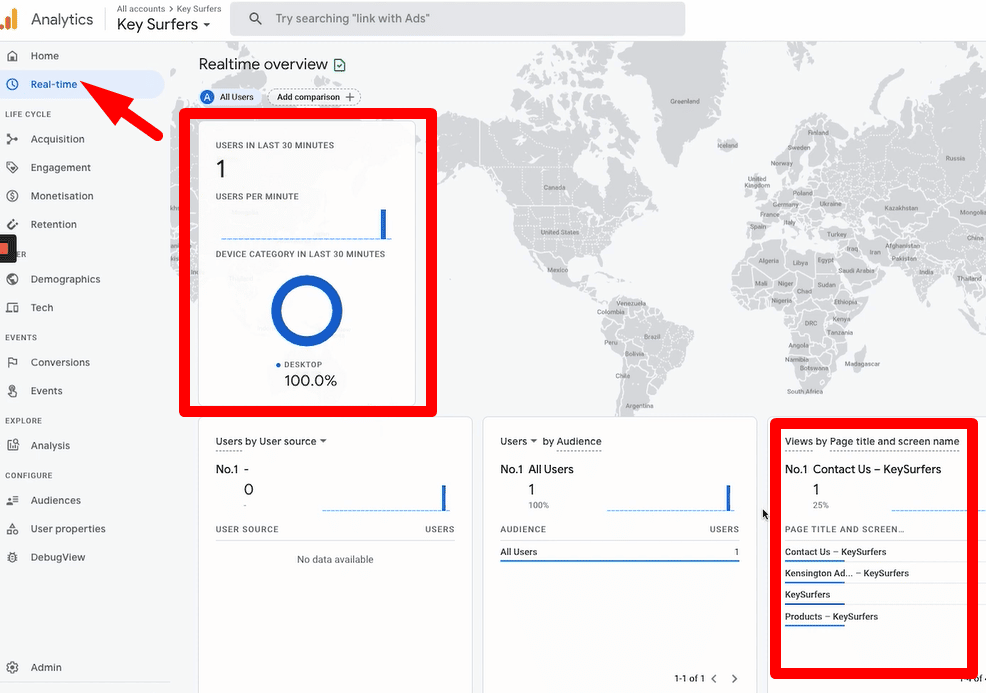
It might take up 2 to 3 minutes for the data to show up, but you can continue to go through the pages in your website so you can see if the new Google Analytics 4 property is getting the information.
If you're not seeing anything in the real-time report page yet, that could mean that your code has not activated yet. Here are the things you can do:
- Refresh Google Analytics, and browse again on your Shopify website.
- Open your Shopify store in an incognito window. Browse around your store and check back in Google Analytics in a few minutes to see if the activity has been recorded in real time.
If you’re not seeing any data in the Real-Time report in Google Analytics, here are some simple troubleshooting steps you can take:
1. View the page source of your store to check if the code is there. To do that, go to your store, right click and select View page source.
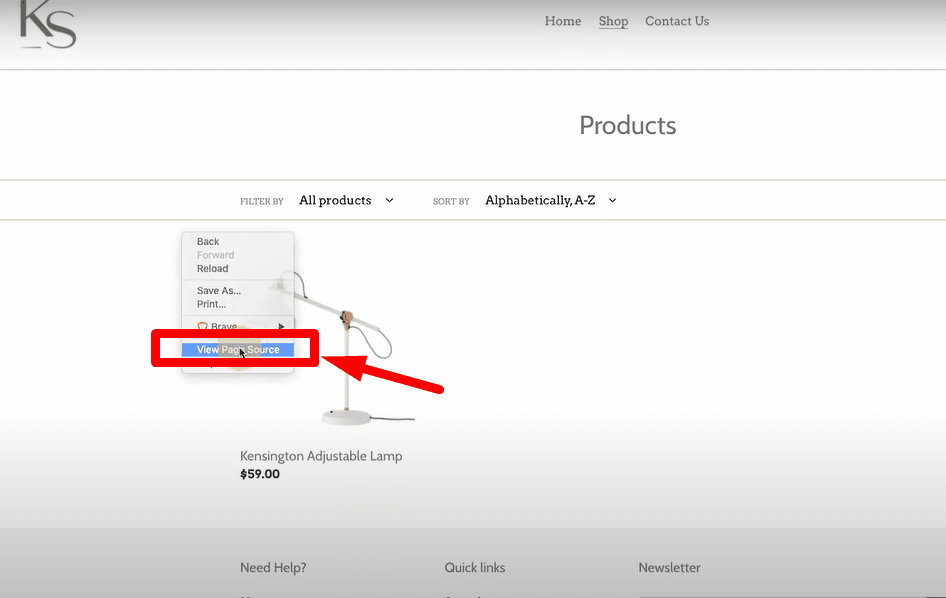
You should see the Google Analytics code you’ve installed right below the tag.

2. Go back to your Shopify dashboard and check if you've clicked “SAVE” in the theme.liquid page after adding the code.
After confirming that the code was correctly and successfully installed, go back to your store, click around for a little while, and re-check in Google Analytics. The data should start showing up in the Real Time report.
Want to get more Ecommerce tips and tutorials just like this? Subscribe to my YouTube Channel and learn more about growing your Ecommerce store. Or book a FREE Strategy call with Sam!


