If your website generates over $20k per month, let’s chat. We’ll discuss your goals and figure out how we can help your business get to its next stage of revenue and growth.
“Almost $4 million in revenue from basically nothing.”
Matt ChildsWine Stash
“[They] helped us to more than 10x our conversions while decreasing the amount we're spending on Adwords almost every day.”
Ellen McCalebHeadwaters Studio
"My conversion rate went from like 1.83 to over 9%."
Pat LangleyVaikobi
“We've been using them for just over a year now and we've had incredible success. We've grown our online business 145% and achieved a ROAS of 4.9. Fantastic return on investment!”
Over 1.4 million views and growing fast on YouTube
We’re proud to be helping thousands of ecommerce business owners by giving the most digestible, battle-tested advice to be found online about succeeding with Google Ads.
Be sure to follow our channel to stay in the loop.
How to Add Products in Google Merchant Center (No Product Feed)
In this blog, you will learn the step-by-step process on how to upload products in Google Merchant Center without creating a new product feed.
Do you want to add a product on your Google Merchant Center but don’t want to create a whole new product data feed from scratch?
That’s easy.
We will also be dropping the best practices to optimize ad titles, images, and product pages to scale up your Google shopping campaigns.
How to Upload Products to Google Merchant Center
Before you upload products to Google shopping, make sure to complete these two steps: (1) verify and claim your Shopify or Ecommerce website URL and (2) set up tax and shipping for the country that you want to advertise in.
Once you’ve completed these two, follow this step-by-step guide on how to upload products to Google Merchant Center.
Step 1: Login to your Google Merchant Center account.
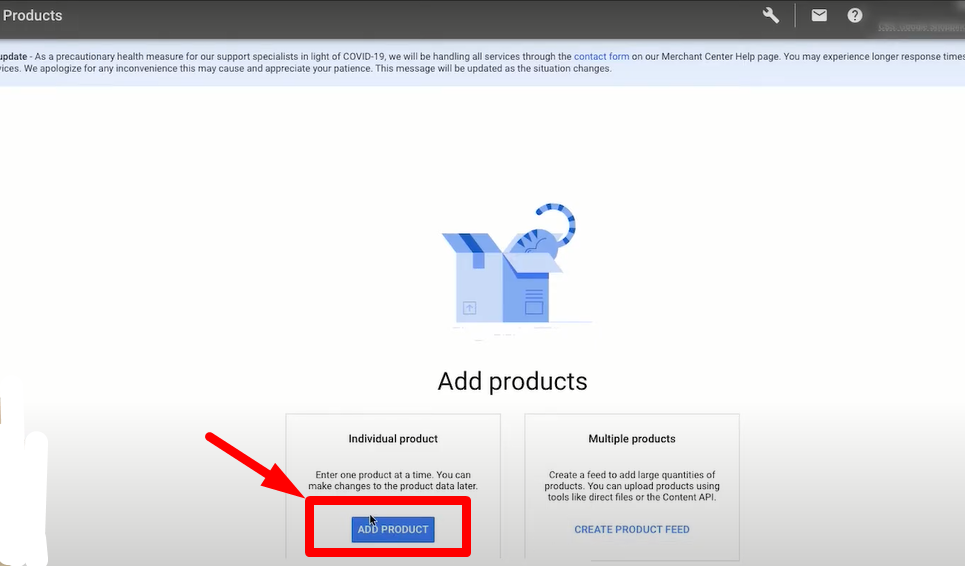
On the left side navigation menu, click Products. When adding products, you will have two options – add Individual product and Multiple products. To upload one product at a time without creating a product feed, click on the “Add Product” button.
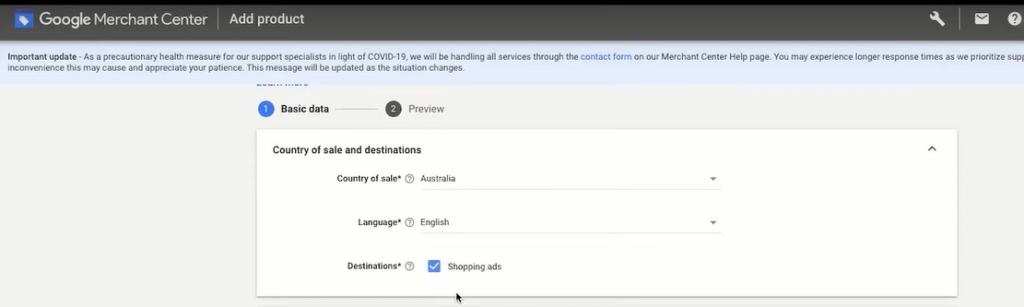
Step 2: Choose your country of sale and destination.
This is the country where you sell your products to. You also need to enter the Destination of your products. Since you want your products to appear in Google Shopping, choose “Shopping Ads.”
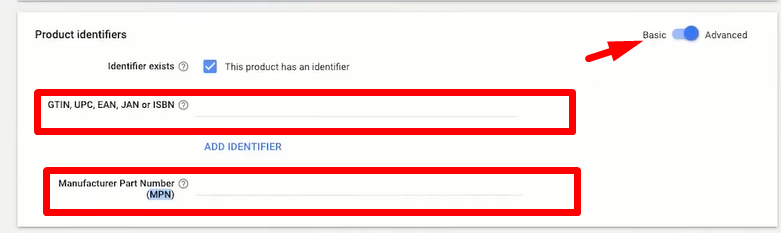
Step 3: Under Product Identifier, add GTIN.
GTIN stands for Global Trade Item Number. It is basically the barcode of your products. If you don’t have it, you can Google your product’s GTIN or directly ask for it from your supplier.
If you don’t have the GTIN, you can click the advance option and put the MPN (Manufacturer Part Number) instead. For MPN, you need to also add the Brand.
If you are selling books, you need to put the International Standard Book Number (ISBN).
For Product Identifiers, it is recommended to use GTIN. Using the product’s GTIN means any shopping reviews of that particular product around the world will be added to your product. So if you are just starting to sell that product, it will save you a lot of time and money in marketing since there are already existing shopping reviews of that product.
Learn more about the different types of product identifiers and how to add GTIN here.
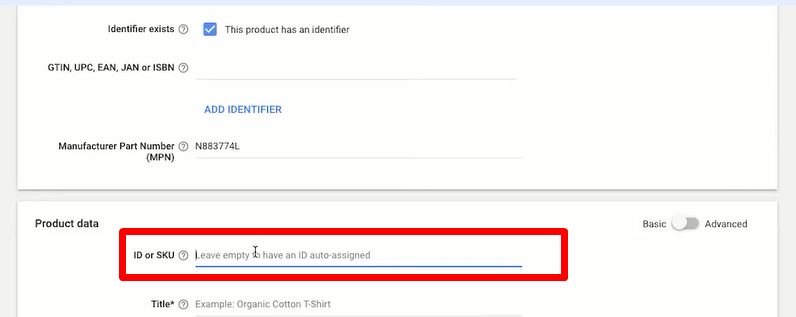
Step 4: Use your actual SKU under Product Data
SKU stands for Stock Keeping Unit. Adding SKU is really important to help you easily identify products. If you offer multiple types of products, you can easily get lost if your product SKU is not properly set. So once you have SKUs, it will be easy to segment products when doing shopping ads.
Step 5: Add your Product Title
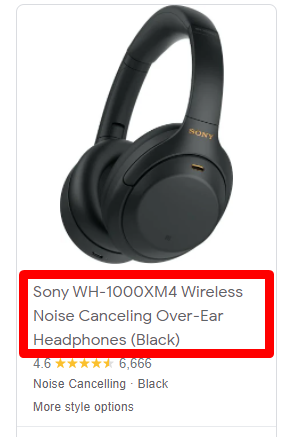
One of the best product feed optimization practices is adding a good product title. Google Shopping product title optimization is very important, and one way to optimize your titles is to add relevant keywords based on what users are searching on Google. Most importantly, if your product is new and not that popular, add specific descriptions of what your product is in the title.
The product title you will add in Google Merchant Center does not have to be the same with the one in your Ecommerce store. Your product ad on Google shopping is a stand alone product, so you need to be more descriptive of what it is.
Here is one example of a good product title:
Step 6: Add Brand Name and Product Description
One of the most effective tricks in optimizing product titles and descriptions is adding the brand name of your products. For the description, you have over 5000 characters and it is best to use it all up so Google can have enough information about your product.
By crafting quality product titles and descriptions, you are helping your customers know more about your products and persuade them, eventually, into making a purchase.
Step 7: Add the Correct Link to the Product Page
For the link, just simply go to your Shopify or Ecommerce store and copy the product link there and paste it on the landing page link option.
Make sure that the link will direct your customers to the right page, the real product page. Google will flag this as an error and will ban your Google Merchant Center account if the link you’ve added directs customers to unrelated pages or a 404 error page.
Step 8: Add your Image URL
In adding your image, you have the option to paste an image URL (the one from your store) or upload an image. If you are using a URL, open the image on a new tab, and copy the link.
When adding a product image, make sure you choose an image that really stands out from the competition. To know what is the best image to use, go to Google Shopping and search for the same product and see what kind of image your competitors are using. Also, Google has some recommendations on how to upload the best image for your product.
Step 9: Add your Pricing and Currency
Add the pricing of the product and the currency. The currency will depend on the country of sale and destination you have chosen, so make sure you use the right currency format approved by Google.
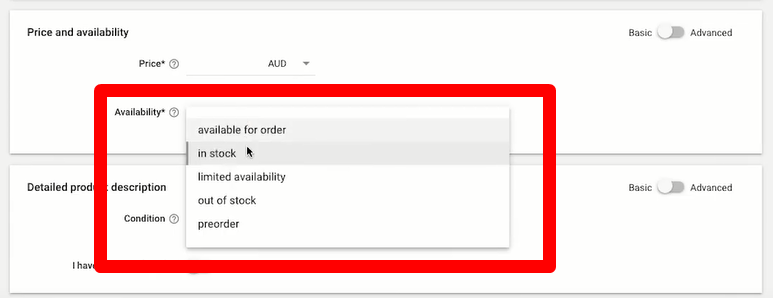
Step 10: Set the Availability and Condition of the Product
Setting the availability of your product is very important. You have the following options:
Available for order
In stock
Limited availability
Out of stock
Preorder
Make sure that the availability of products in Google Merchant Center corresponds with the availability in your website; otherwise, Google will disapprove your products or ban your account.
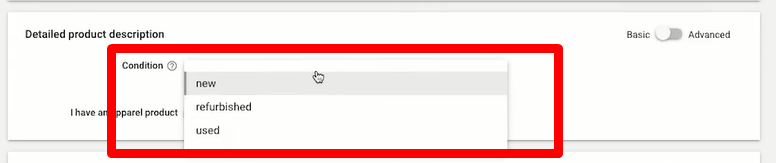
You can also set the condition of your product under the Detailed Product Description part. You can choose among “new”, “refurbished”, and “used.”
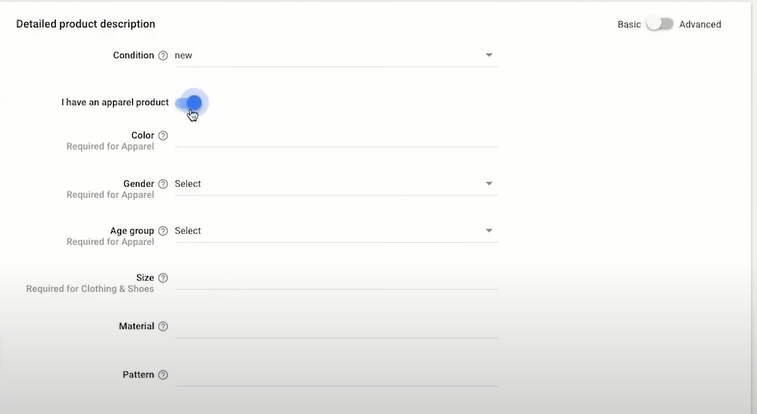
If you are selling an apparel product, you have to add extra information like color, gender, age group, size, etc.
Once everything has been filled out, click save and wait for at least 30 minutes while Google reviews your product data feed.
To check if your newly added product has been approved, go to Products on the navigation menu and click All Products. If you want to add another product, just click the “Add” button and do the same process again.
Start Optimizing and Advertising Your Products
Products added individually are not available for local inventory ads and cannot be combined with inventory feeds. Unlike product feeds that offer 30-day expiration, products uploaded individually in Google Merchant Center do not have an expiration date unless you remove them yourself. Also, these individual products cannot be affected by feed rules.
Now if you made changes on your website, such as updating your product price or its availability, you can turn on Google Merchant Automatic Item Updates, so all your website updates, specifically price and availability, will reflect on your Google Merchant Center feed.
If you are running a Shopify or Ecommerce store, it is important that you advertise your products using Google Shopping. Studies report that Google Shopping ads generate about 26% higher conversion rates and have a 23% cost-per-click than text ads. Moreover, Google has Google Shopping Feed Management and processing to help you optimize the performance of your Google Shopping campaigns.
Want to get more Ecommerce tips and tutorials just like this? Subscribe to my YouTube Channel and learn more about growing your Ecommerce store remotely.
Founder of KeyCommerce, Sam has been working in digital marketing and Ecommerce since 2013. With a background in finance and accounting, he brings his profit-driven approach to Ecommerce in a niche obsessed with just clicks and revenue. He's worked closely with the team to bring new stores to scale, training and growing the team and helping get better and better results for our clients.
We’ve generated millions for our clients, using the methods we’ve developed over years with a singular focus on Google Ads for ecommerce. To discover how we can help grow your business:
You can also subscribe to our weekly email newsletter to get real-world tested growth and optimization strategies, as well as notifications on anything you may need to know as an ecommerce store owner.
Browse our blog, written and structured to be the best resource in the world for anyone starting and growing their online store. It includes strategy guides, setup instructions, checklists, and tools.
Explore our KeyCompendium, which is a comprehensive wiki of digital marketing terms. Many readers have commented on the usefulness of this content.