The plugin is called Product Feed Pro and it’s free to use. Using this WordPress Google shopping plugin, you can easily create a Google product feed for your WooCommerce store and use it to start making your products more discoverable in Google searches.
Read below to learn more about Product Feed Pro, how to install it, and how to set it up so you can quickly get your feed set up, and get your shopping campaigns live for your WooCommerce Ecommerce store.
How to Install WooCommerce Product Feed Pro
To install the WooCommerce Product Feed Pro Google Shopping feed plugin, follow the steps below:
1. Log in to your WordPress dashboard.
2. On the left navigation pane, click on Plugins.
3. On the next page click the Add New button.
4. On the plugins page, search for “Product feed pro.” It will be the first plugin that will show up on the results page. You can also download Product Feed Pro directly from here.
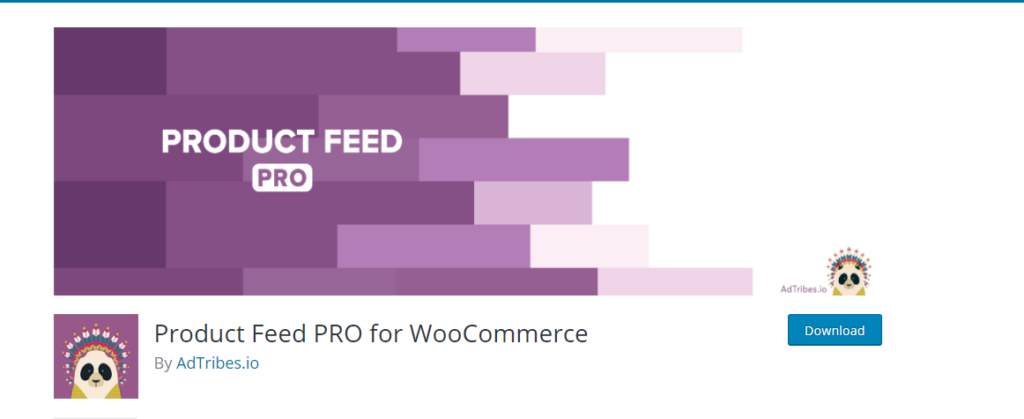
5. Click on the Install button. Then click Activate.
You have successfully installed Product Feed Pro to your WooCommerce store. The next step is to add custom attributes to your products.
Add Custom Attributes to Your WooCommerce Products
Before you jump into creating your feed, you need to go into your products to add attributes that aren’t normally added in your product. These custom attributes are very important because Google Shopping needs extra information to start showing your ads. To add the custom attributes to your products, follow the steps below:
1. On the left navigation pane, click on Products, then select Attributes.
2. On the Attribute page, you will see the “Name” bar, and here’s where you’re going to add the custom attributes for your WooCommerce Google Shopping feed, such as the following:
- Brand
- GTIN – Global Trade Item Number
- MPN – Manufacturing Product Number
3. Type each of these attributes in the Name bar and then click on the Add attribute button.
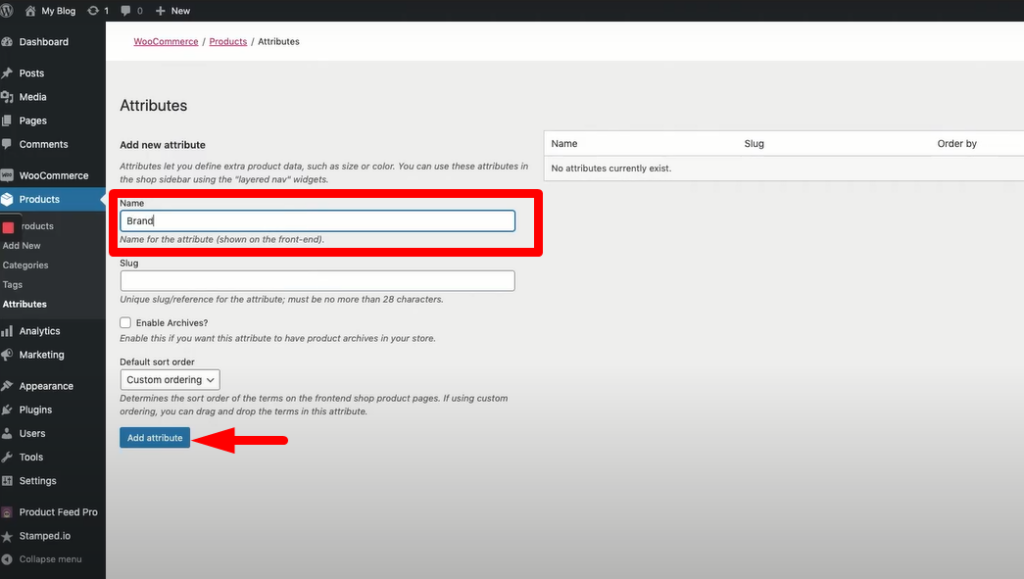
All the added custom attributes for your WooCommerce Google product feed will now appear on the right side of the Attributes page.

4. Go to Products to add the custom attributes you’ve just created.
5. Select the product you want to edit and the attributes to.

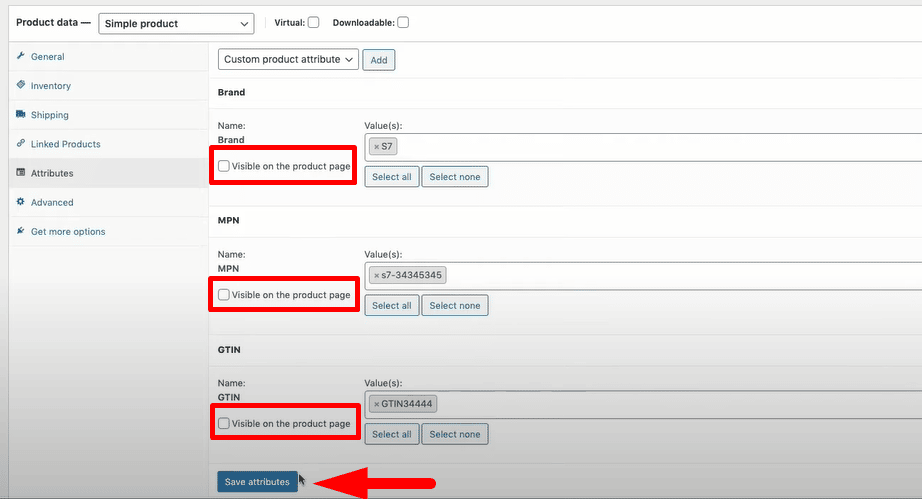
6. Scroll down to the Product Data section and select Attributes. Click on the Custom product attribute dropdown to choose from your list of attributes.

7. The next step is to go over each attribute and add the actual Brand, MPN, and GTIN of your product. Just click on the attribute and add the value.
IMPORTANT NOTE: You don’t have to add all three attributes to your products. You can either choose to add the Brand and GTIN (if you have the GTIN already) or the Brand and your MPN. You can search for your product’s GTIN in Google or directly ask for it from your supplier. If you don’t have this information yet, you can add the MPN because you can basically create this yourself using your product SKU.
When all custom attribute values have been added, make sure that they’re NOT visible on the product page so just leave those boxes unchecked. Then, click on Save attributes.
Now, it’s time to set up your WooCommerce product feed.
How to Set Up your WooCommerce Google Shopping Feed
You’ve already added the custom attributes to your products. The next step is to set up your Google shopping feed using the WooCommerce Google Shopping plugin we’ve just installed, Product Feed Pro.
On the left navigation pane, click on Product Feed Pro to create your product feed.
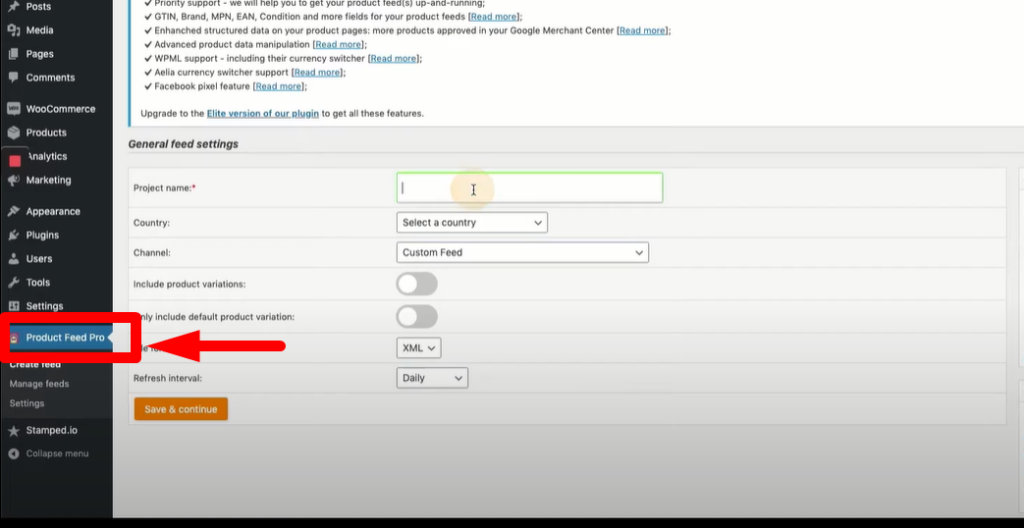
STEP 1: Add the General Feed Settings
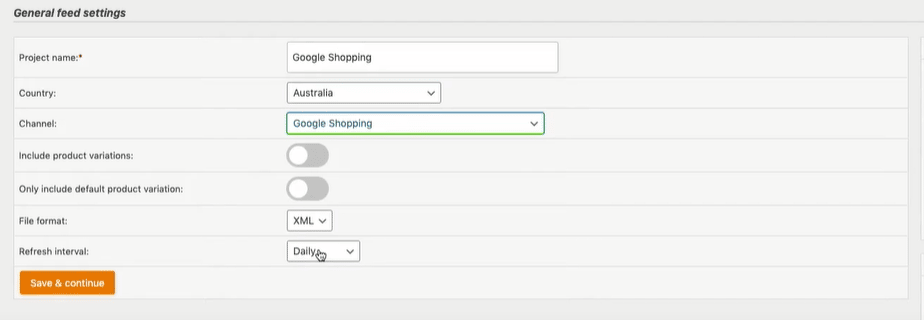
To start creating your WooCommerce Google Shopping feed, you need to add the general feed information, including the Project Name, Country, Channel, any product variations, etc. After adding those in, just click Save & continue.
STEP 2: Complete the Field Mapping Section
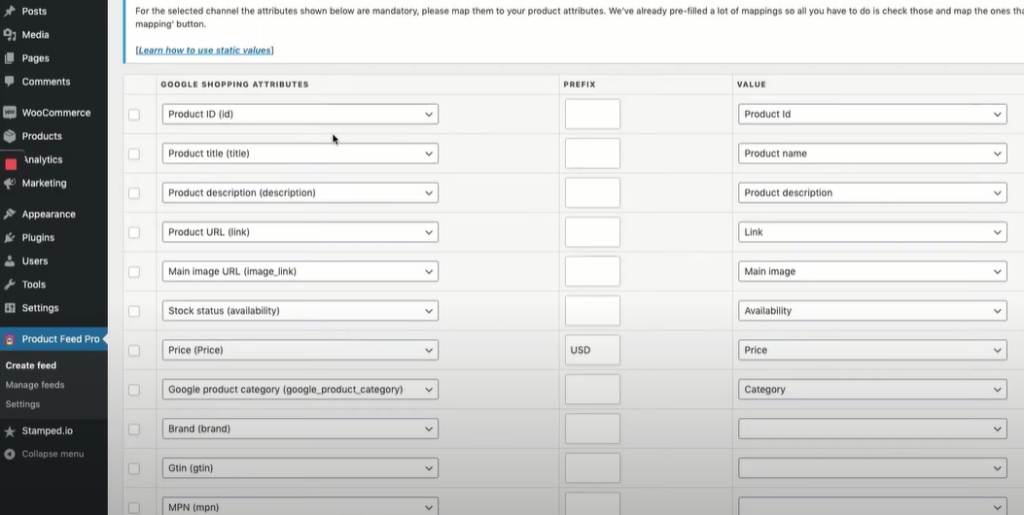
This is the section where we tell the plugin what parts of the attributes we have in our WooCommerce feed we want to match with the information required in Google Merchant Center.
For example, the Product Name attribute in WooCommerce is called Product Title in Google Shopping. You need to map these out and match the information so Google Merchant Center could process your product data feed, and forward that information to Google Shopping for your ads.
That is why we’ve added the three custom attributes (Brand, MPN, and GTIN) previously in this tutorial. All these three attributes are required for Google Shopping, but you will see that they’re not automatically added to your WooCommerce feed.
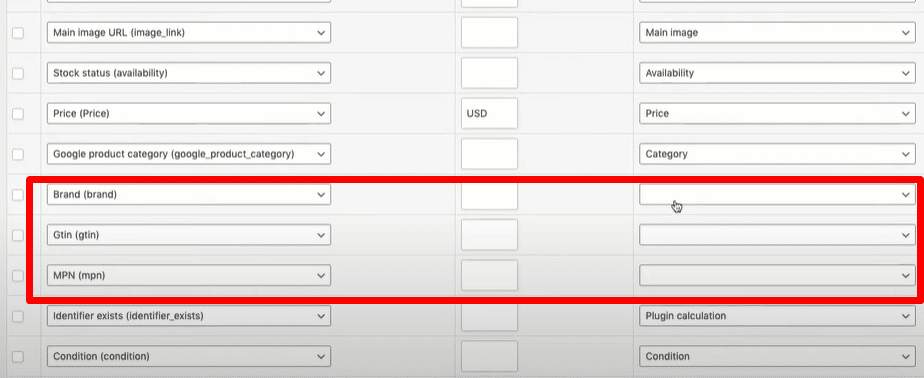
Since we’ve already added these three attributes, we can just easily find them from the dropdown list and match them with the attributes in Google Shopping.

Once you’ve added those three, just click Save and proceed to the next step.
STEP 3: Add the Google Shopping Category
Google has provided a complete taxonomy for all its product categories, and all you need to do is find your product category from this massive list with the code and category of different products.
What you can do is to search for your product using the find function (CTRL + F). In this example, the product we have is a surfboard.
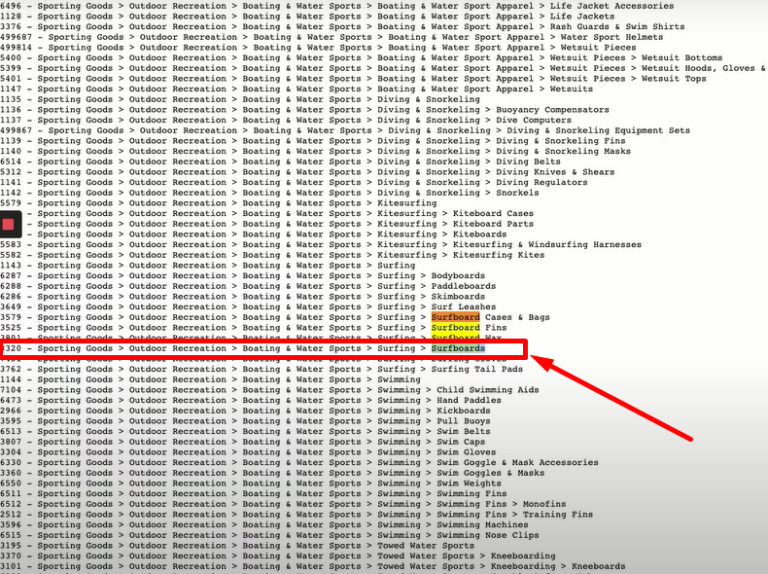
You’re just going to copy the category ID, which is 3320 for this surfboard product and paste it in the Google Shopping category bar.
Product Feed Pro will automatically pull out the product category, and the next thing you need to do is hit the Save mappings button.

STEP 4: Add Feed Filters and Rules
This is a more advanced strategy in optimizing your product data feed. But what this section basically does is it allows you to add conditions and values to, for example, your product titles.
Let’s say you have 50 products and you want to add your brand name to the beginning of all your products’ product titles. Adding feed rules will allow you to add the brand name without having to edit your products one by one. This will save you a lot of time and help you in your Google Shopping product title optimization.
STEP 5: Set Up Conversion & Google Analytics Settings
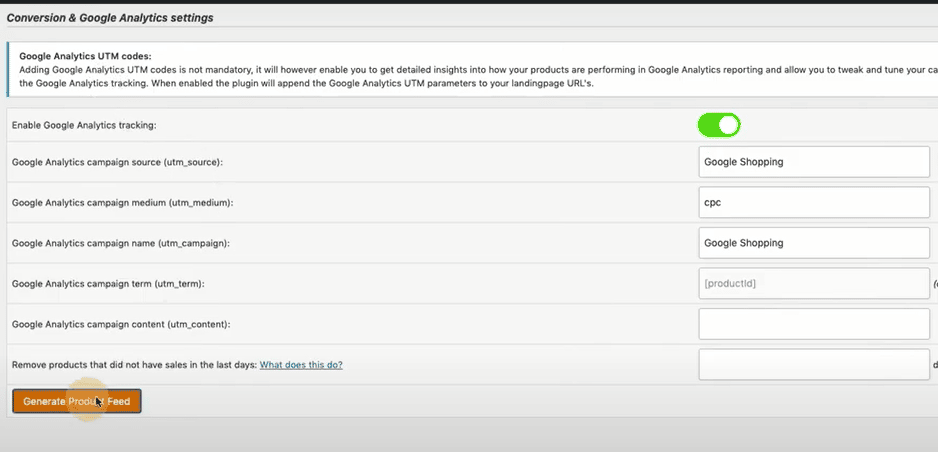
The next section in the WooCommerce product feed setup process will ask if you want to enable Google Analytics tracking for your product feed. So, if you want to add Google Analytics UTM codes, just make sure the toggle bar is turned on. Then, click Generate Product Feed.
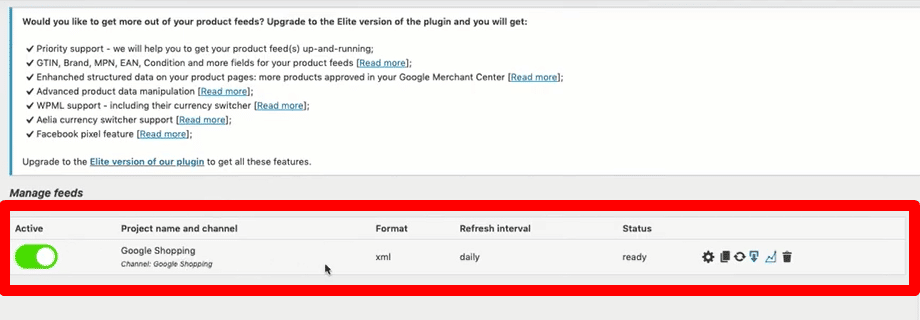
Once that’s done, you will see that your WooCommerce Google Shopping feed is now ACTIVE, and you can now check the XML file of the feed to see if all the details are correct.

How to Add your WooCommerce Google Product Feed to Google Merchant Center
You’ve successfully created your Google Shopping feed in WooCommerce using Product Feed Pro. The next step is to add that feed to your Google Merchant Center account. Follow these steps to add your feed to your Merchant Center account:
1. Log in to Google Merchant Center.
2. In your dashboard, navigate to the left pane and click on Products and select Feeds.
3. Click the “plus sign” button to create a new feed.
4. In the Basic Information section, choose the Country of Sale and make sure this matches the country you’ve set to your feed originally. Choose the Language and the Destinations, and then click CONTINUE.
5. In the Name and Input Method section, add the Primary Feed Name, for example WooCommerce Feed. Then select Scheduled Fetch for how you want to set up and connect your data to Merchant Center. Click CONTINUE.
6. In the Setup section, first you need to copy the XML file link of your WooCommerce product feed and paste it into the File URL. Then, copy the last bit of the link and paste it into the File name.
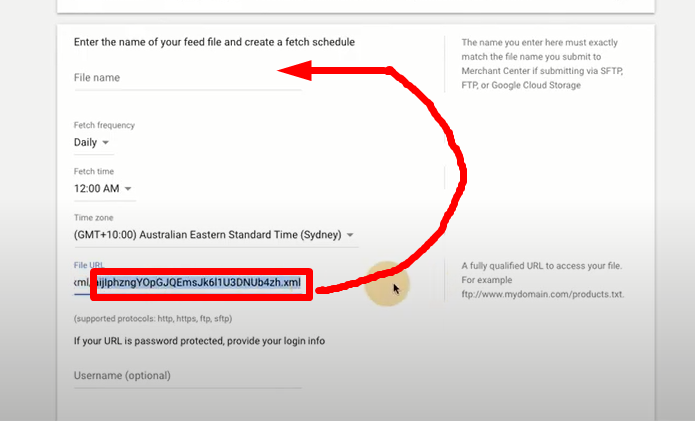
7. For the Fetch Frequency and Fetch Time, select Daily and 12:00 AM, respectively. And just leave the Username and Password fields blank.
8. Click on Create Feed.
9. Once that’s created, you will see your WooCommerce Google Shopping feed and all you need to do now is Fetch your Feed. So, click on the feed, and on the next page, click Fetch Now.
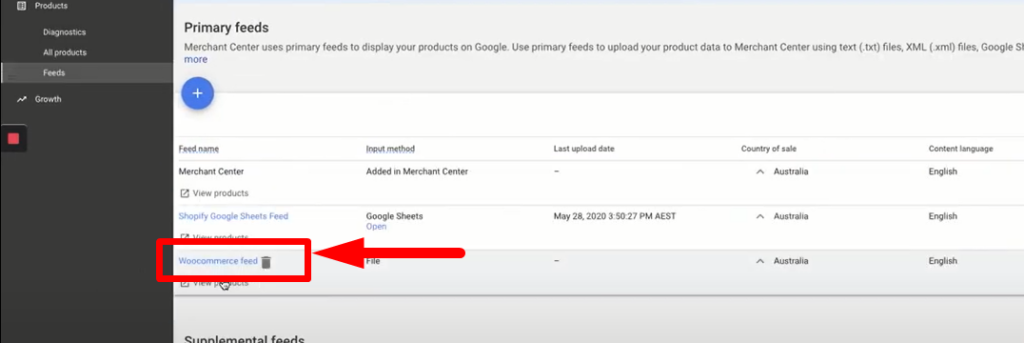

Please note that it may take a couple of minutes for Google Merchant Center to process the feed depending on how many products you have on your feed. You can check after five minutes and refresh the page.
What if your WooCommerce Google Product Feed Doesn't Get Approved?
Many Ecommerce store owners and Google Ads managers would agree that one of the dreaded steps in creating our Google Merchant Center feed is actually getting it approved. So, what should you do if the WooCommerce Google Shopping feed you’ve created and added in Merchant Center is disapproved after fetching?
Once the feed has been processed, Google will tell you if your feed has been approved; otherwise, it will show you a list of errors that you need to fix in order for the feed to be approved. This should not be hard if you only have one or ten products in your product feed. But for some stores with fifty to even a hundred products, that is going to be a disaster.
These errors may include shipping information, incorrect URL, incorrect currency, to name a few. And you need to go back to your feed and fix these errors one by one. And once you’ve made sure that all of them are fixed, you will go back to Google Merchant Center and re-fetch your feed. Getting your product feed approved in Google Merchant Center is quite a painful process. However, you can only start creating your Google Shopping campaigns if this feed is approved and start your journey towards success.
Want to get more Ecommerce tips and tutorials just like this? Subscribe to my YouTube Channel and learn more about growing your Ecommerce store. Or book a FREE Strategy call with Sam!


