The good thing about using this method is that it’s fully automated and will make it super easy to keep track of your profit margin and know how much money you’re making.
I’ve also created an order CRM template that will allow you to see all the information about all orders you receive: Order #, Order price, Shipping price, Total customer price, Order contents, Cost of order (paid to the supplier), and more. Just add your email address below to get access to this template.
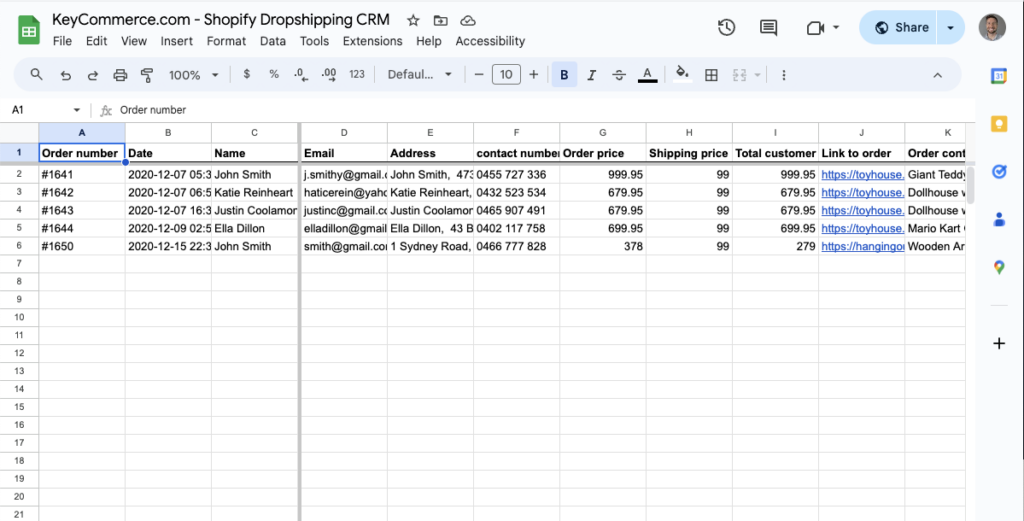
Get our Shopify Dropshipping CRM Template Now!
Link Shopify and the Google Sheets CRM Using Zapier
Shopify has a feature where you can automatically send an email to your supplier every time you receive an order in your store. However, this can become complicated and difficult to keep track of, especially if you’re doing high-ticket and you want to send these emails by yourself at the start.
You can automate this process and use the CRM template I have provided using Google Sheets to track everything. This template allows you to oversee order status, sending the right order to the correct supplier, paid each one individually, and make sure that the supplier sends out the product to the customers.
All you need to do is link the Google Sheets CRM and Shopify using Zapier.
Zapier is a software that allows you to connect two or more pieces of software, send data, and automate processes to make your life easier. To link Google Sheets and Shopify, follow these steps:
STEP 1. Create your own copy of the CRM.
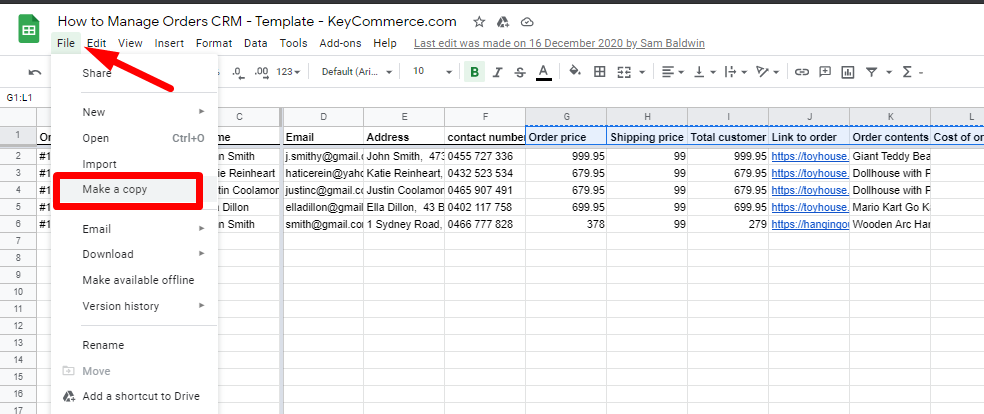
Once you get access to my CRM Template, create your copy by going to File at the top ribbon and click Make a copy and save that in your own Google drive.
STEP 2. Create Zapier Account
Sign up for Zapier and create your account: https://zapier.com/app/login?next=%2Fapp%2Fbilling%2Fplans
STEP 3. Make a Zap.
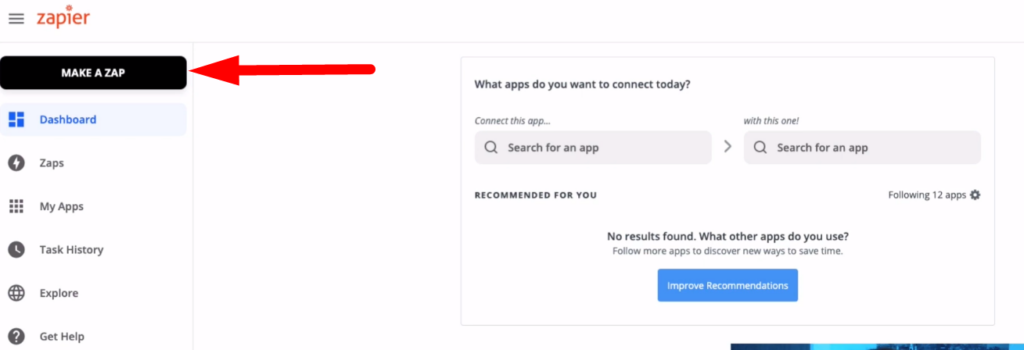
Once you’ve created your Zapier account, go to the dashboard to create the link between Shopify and Google Sheets. Click Make a Zap.
STEP 4. Search for the Shopify app.
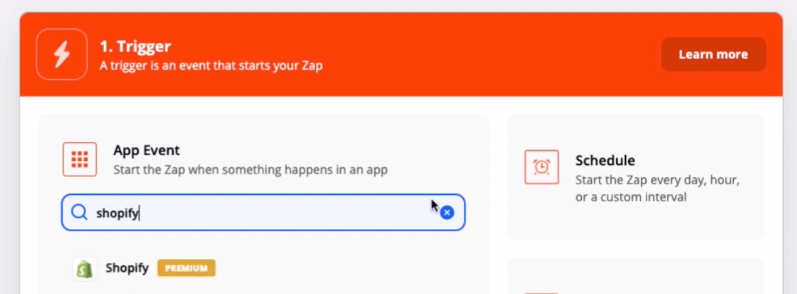
STEP 5. Create the Event to TRIGGER the automation.
For this automation, you need to choose “New Order” so every time a “new” is made in the CRM template, it triggers the automation. Then just click Continue.
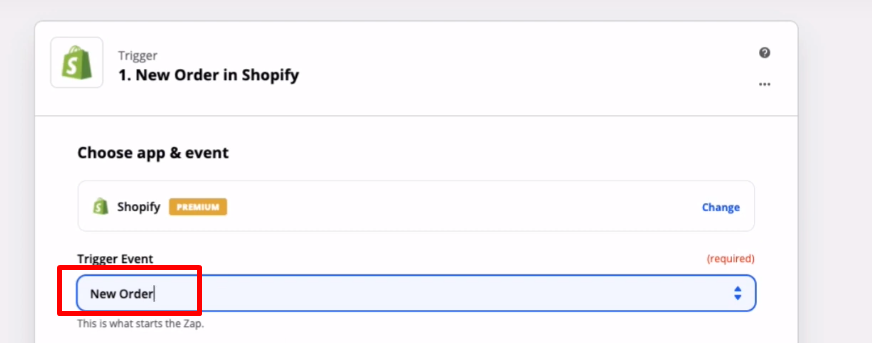
It’s then going to ask you to choose your Shopify account, so make sure you’re already signed in to Shopify. Click Save & continue, then click Test trigger. This is going to pull a test order from your store. Just click Continue.
STEP 6. Choose the Action.
The “Action” is the event that will happen when you get a New Order in your Shopify store. Just search for Google Sheets because that’s the second software that we’re using.
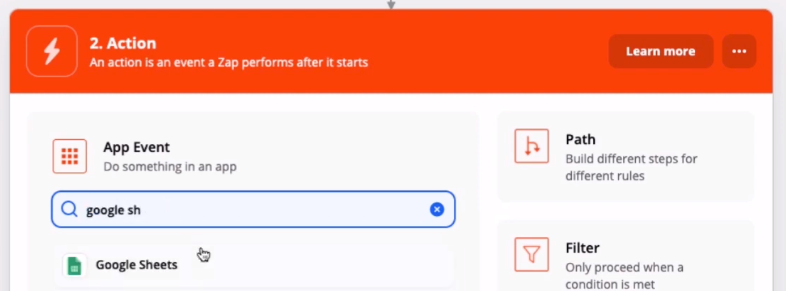
For the action event, choose Create a spreadsheet row to record all new orders in a new row in the CRM template. Then click Continue.
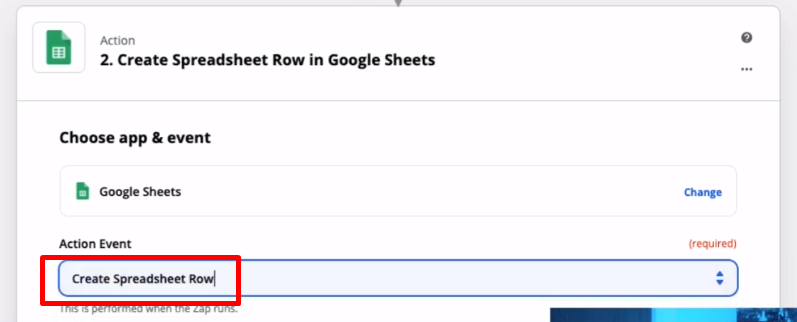
You will then be asked to choose your Google account, so make sure you’re logged in to the correct Google drive account where your CRM template is saved. Then click Save & continue.
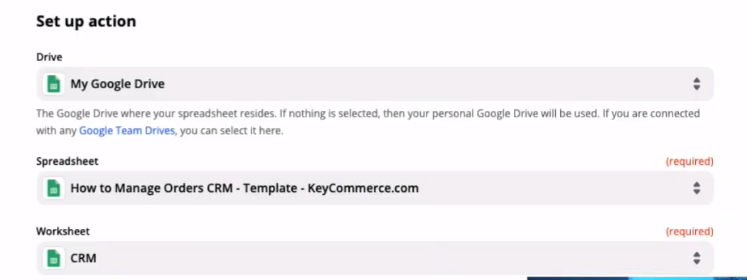
It’s then going to ask you to choose the right drive and pull in the sheet you want to use. Just search for the name of the sheet, for example, “how to manage orders CRM template key commerce,” depending on the name you have used to save the template.
For the Worksheet, there’s only one worksheet in this template called “CRM,” so just click on CRM.
STEP 7. Assign the correct data to the right column in the CRM.
In this step, we want to tell Zapier which column equals which part of the order. Just follow the values below.
- Order # – “Name (with the actual order number)”
- Date – “Updated At (with the actual date)”
- Name – “Customer First Name (space) Customer Last Name”
- Email – “Email”
- Address – “Shipping Address Address1, Shipping Address City, Shipping Address Province, Shipping Address Zip”
- Contact Number – “Shipping Address Phone”
- Order Price – “Total Price”
- Shipping Price – “Shipping Lines Price”
- Total Customer Price – “Total Lines Item Price”
- Link to Order – “Order Status URL”
- Order Content – “Line Items Name”
Those are all the items that you need to fill out. For the remaining item names, just leave them all empty because we’re going to fill those in manually in the actual CRM. Next, click Save & continue. Then click Test & continue to test the automation.
To check if you’ve correctly set up the automation, go back to the CRM sheet, and you should see a new row with the data that was automatically added when you tested the zap you’ve created.
If all data is correct, just go back to Zapier and click Turn on Zap to complete the link between Shopify and Google Sheets.
And that’s it! You have successfully automated your Shopify orders for your dropshipping store. This automation is going to run every time a new order is placed in your store. The whole process took you 10 to 15 minutes to set up, but now you have an “automated VA” that makes it really easy for you to manage orders.
Every time there’s a new order, you get notified via email, and you know that all information has already been added to your CRM automatically; you can then send it to your supplier. And once you pay, you just type in YES in the sheet, so when you do your accounting later, it’s really easy to see and track.
Additionally, you can put the actual invoice number from the supplier and mark it in the sheet once the product has been delivered to your customer.
This method works effectively for dropshipping store owners who are doing a lot of high ticket sort of sales and are generally receiving tens of thousands of orders per month.
Want to get more Ecommerce tips and tutorials just like this? Subscribe to my YouTube Channel and learn more about growing your Ecommerce store remotely.


